Fall Protection for Roof: A Homeowner’s Guide to Staying Safe During Roofing Work


Roof work is one of the most dangerous home improvement projects. Whether you’re replacing shingles, cleaning gutters, inspecting storm damage, or hiring a contractor, understanding fall protection for roof work can help prevent serious injuries and ensure the job is done safely.
Many homeowners assume that safety equipment is only necessary for professional roofers. In reality, even a short climb onto a roof carries significant risk, especially on steep slopes, wet surfaces, or aging roofing materials. Knowing the basics of roof fall protection also helps you evaluate whether a contractor is following proper safety practices.
This guide explains how roof fall protection works, when it’s required, the equipment professionals use, what homeowners should and shouldn’t do, and when it’s best to leave roofing work to experienced contractors.
Quick Answer
Fall protection for roof work includes safety systems that prevent workers from falling or reduce injury if a fall occurs. Common methods include personal fall arrest systems, guardrails, safety nets, roof anchors, and warning lines. For most homeowners, the safest choice is to avoid DIY roof work and hire qualified roofing professionals who follow proper safety standards.
Why Fall Protection Matters
Falls remain one of the leading causes of serious injuries and deaths in construction. Roofing projects are especially risky because workers often operate on sloped, elevated, and sometimes slippery surfaces.
According to the Occupational Safety and Health Administration (OSHA), fall protection is one of the most important safety requirements during roofing work.
Even experienced roofers can lose their footing because of:
- Wet shingles
- Loose roofing materials
- Moss or algae growth
- Steep roof pitches
- Unexpected roof damage
- High winds
- Poor ladder placement
For homeowners, understanding these risks helps you make smarter decisions before climbing onto your roof.
What Is Fall Protection for Roof Work?
Fall protection refers to equipment and safety procedures designed to prevent falls or minimize injuries if a fall happens.
Professional roofing crews typically use multiple layers of protection instead of relying on a single safety device.
These systems may include:
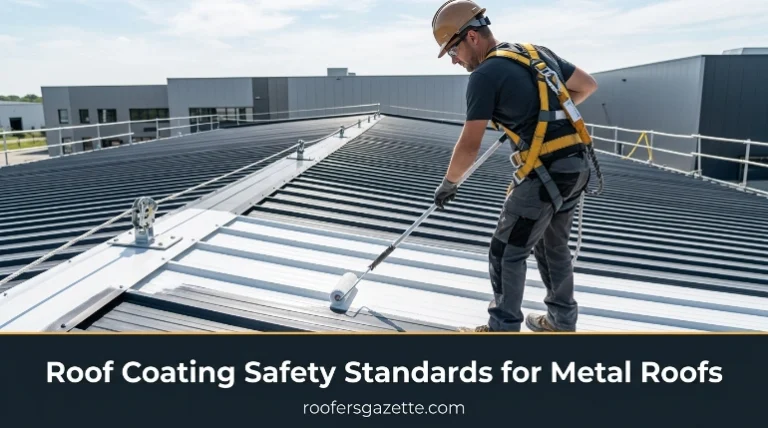
- Personal fall arrest systems
- Roof anchors
- Safety harnesses
- Lifelines
- Guardrails
- Warning lines
- Safety nets
- Proper ladder safety
Each system serves a different purpose depending on the roof type and the work being performed.
Common Types of Roof Fall Protection
Personal Fall Arrest System (PFAS)
A personal fall arrest system is one of the most common forms of roof protection.
It usually consists of:
- Full-body safety harness
- Shock-absorbing lanyard
- Lifeline
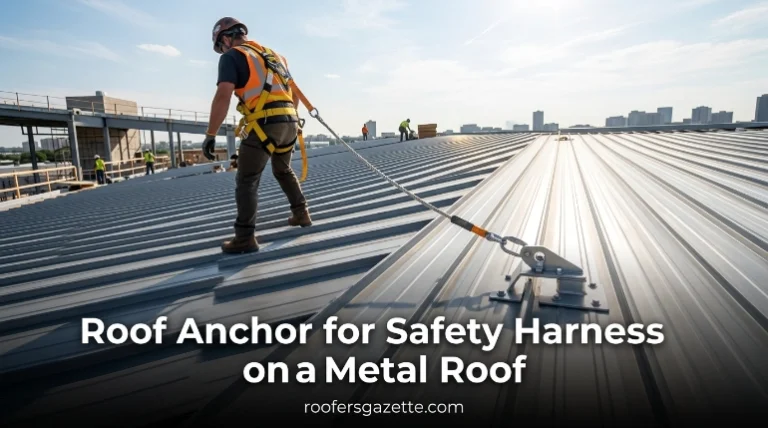
- Secure roof anchor
If a worker slips, the system stops the fall before they hit the ground.
This is the preferred protection method on many residential roofing projects.
Roof Anchors
Roof anchors are permanently or temporarily attached to the roof structure.
They provide a secure connection point for a safety harness and lifeline.
Roof anchors should always be installed according to the manufacturer’s specifications and attached to structural framing—not just shingles or roof decking.
Guardrail Systems
Guardrails create a physical barrier around roof edges.
They are commonly used on:
- Flat roofs
- Commercial buildings
- Roofs with frequent maintenance access
Although less common on residential homes, guardrails provide excellent protection because workers don’t need to wear harnesses while inside the protected area.
Safety Nets
Safety nets are installed below the work area to catch workers if they fall.
They’re more common on large commercial or industrial projects than on typical residential homes.
Warning Line Systems
Warning lines use ropes, chains, or flags to mark safe working areas.
They help workers recognize dangerous roof edges.
These systems are generally used on low-slope commercial roofs and are often combined with additional protection methods.
Roof Fall Protection Equipment Overview
| Equipment | Purpose | Best For | Typical User |
|---|---|---|---|
| Full-body harness | Stops falls | Residential roofing | Professional roofers |
| Roof anchor | Secure attachment point | Sloped roofs | Professional roofers |
| Lifeline | Connects worker to anchor | Most roofing jobs | Professional roofers |
| Guardrails | Prevent edge falls | Flat roofs | Commercial crews |
| Safety nets | Catch falling workers | Large construction projects | Commercial contractors |
| Ladder stabilizer | Improves ladder safety | Roof access | Homeowners & professionals |
When Is Fall Protection Required?
Safety requirements vary depending on:
- Roof slope
- Building height
- Local building regulations
- Type of roofing work
- Employer safety policies
For professional contractors in the United States, OSHA has detailed regulations covering residential construction and fall protection requirements. Homeowners can review the OSHA residential construction guidance to better understand industry expectations.
Even if you are not legally required to use professional safety equipment, using no protection at all significantly increases the risk of serious injury.
DIY Roof Work: Is It Worth the Risk?
Many homeowners consider climbing onto the roof for simple maintenance.
Some common tasks include:
- Cleaning gutters
- Removing leaves
- Inspecting shingles
- Installing holiday lights
- Cleaning roof moss
While these jobs may seem easy, they involve real hazards.
DIY May Be Reasonable For:
- Viewing the roof from a securely placed ladder
- Using binoculars from the ground
- Flying a drone for inspections
- Checking gutters from ladder level
DIY Should Usually Be Avoided For:
- Walking on steep roofs
- Roof repairs
- Shingle replacement
- Flashing repairs
- Skylight work
- Chimney repairs
If you’re unsure about your footing, stay off the roof.
Expert Tip:
Never judge a roof’s safety by its appearance alone. Even newer roofs can become dangerously slippery from morning dew, dust, pollen, or algae. A professional inspection is often safer and more cost-effective than risking a fall.
Signs Your Roof Needs Professional Attention
You don’t always need to climb onto your roof to notice problems.
Watch for these warning signs:
- Missing shingles
- Water stains on ceilings
- Sagging roof sections
- Loose flashing
- Damaged gutters
- Granules collecting in gutters
- Visible storm damage
- Mold or mildew in the attic
Many of these issues can be spotted safely from the ground or with binoculars.

How to Choose a Roofing Contractor Who Takes Safety Seriously
Not every contractor follows the same safety practices.
Before hiring anyone, ask questions such as:
- Do your crews use fall protection systems?
- Are workers trained in roofing safety?
- Do you carry liability insurance?
- Do you have workers’ compensation coverage?
- Will roof anchors or harnesses be used?
- How do you protect landscaping during the project?
Professional contractors should answer these questions confidently.
The National Roofing Contractors Association (NRCA) also provides educational resources that promote safe roofing practices across the industry.
Safety Tips for Homeowners
Even if you never climb onto your roof, you can reduce risk by following a few simple practices.
- Inspect your roof from the ground first.
- Use binoculars or a drone when possible.
- Never climb during rain or strong winds.
- Keep ladders on stable, level ground.
- Wear slip-resistant footwear if using a ladder.
- Stay away from power lines.
- Don’t work alone.
If conditions feel unsafe, they probably are.
When to Call a Roofing Professional
Some roofing jobs should always be left to trained professionals.
Call a roofing contractor if you notice:
- Active roof leaks
- Storm damage
- Large missing shingle sections
- Soft roof decking
- Structural sagging
- Chimney flashing damage
- Skylight leaks
- Roofs steeper than about 6:12 pitch
Professionals have the equipment, training, and fall protection systems needed to perform these repairs more safely.

Common Mistakes Homeowners Should Avoid
- Assuming a low roof is automatically safe.
- Walking on wet shingles.
- Using worn or unstable ladders.
- Ignoring loose gutters while climbing.
- Attempting repairs after storm damage.
- Wearing smooth-soled shoes.
- Working alone.
- Hiring contractors who ignore basic safety equipment.
- Believing experience alone prevents falls.
- Skipping inspections after severe weather.
Step-by-Step Guide to Safe Roof Access
Even with the best fall protection on roof surfaces, safety begins before your foot ever touches the first rung of a ladder. Follow these critical steps to prepare for your project.
- Assess the Weather: Never get on a roof if it is raining, snowing, or excessively windy. Morning dew can make asphalt shingles dangerously slippery. Wait for a dry, calm, and clear day.
- Inspect Your Equipment: Check your ladder for loose rungs and ensure your harness and lanyard have no frays, tears, or broken buckles.
- Set Up the Ladder Correctly: Apply the “1-to-4 rule.” For every four feet of ladder height, the base should be one foot away from the wall. The ladder should also extend at least three feet above the roofline for safe stepping.
- Secure the Ladder: Tie the top of the ladder to a secure point on the house to prevent it from sliding sideways while you transition onto the roof.
- Install the Anchor Properly: If you are installing a temporary roof anchor, ensure you are driving the heavy-duty screws directly into the underlying wooden trusses, not just the thin roof decking.
- Always Face the Roof: When climbing up or down, always face the ladder and maintain three points of contact (two hands and one foot, or two feet and one hand) at all times.
Setting Up Your Ladder Safely
Most roof-related accidents happen not on the roof itself, but while climbing up or down. Incorrect ladder placement is a leading cause of instability.
- Inspect the Ladder: Check for cracked fiberglass, bent aluminum rungs, or loose locking hinges before moving it into position.
- Choose Level Ground: Place the ladder base on firm, flat ground. Never prop a ladder up on loose bricks, buckets, or sloping dirt beds.
- Apply the 4-to-1 Rule: For every four feet of vertical height to the roof line, move the base of the ladder one foot away from the exterior wall.
- Extend Past the Roof Edge: Ensure the top of the ladder extends at least three feet (36 inches) above the roof edge or gutter line to provide a secure handhold when transitioning.
- Secure and Tie Off: Have a helper anchor the bottom of the ladder, or tie the top secure to a stable structural point to prevent side-slipping.
Consult resources such as the CDC and NIOSH ladder safety guidelines for comprehensive visual diagrams and setup procedures.
Do Not Forget Skylights and Roof Openings
Roof edges are not the only fall hazards.
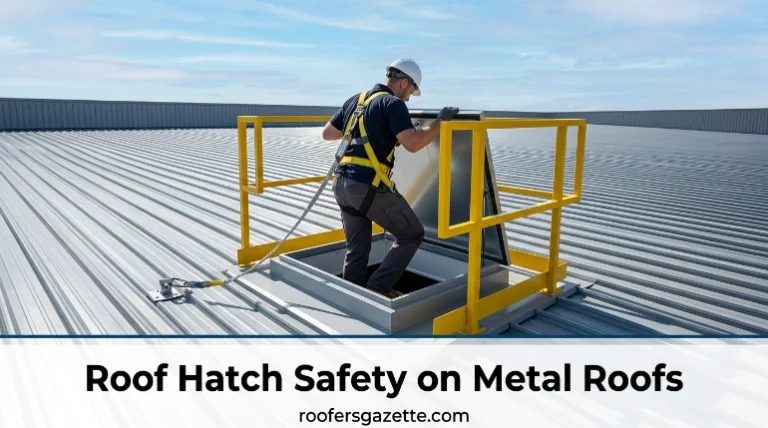
Skylights, open roof hatches, damaged decking, unfinished penetrations, and concealed weak areas can create fall-through hazards.
This is especially important during replacement work.
Once roofing material or damaged decking is removed, areas that previously looked solid may become dangerous.
OSHA’s residential reroofing guidance recommends protecting workers around skylights and openings using appropriate systems such as guardrails, personal fall arrest systems, or suitable protective covers.
Homeowners should never assume a skylight can support body weight.
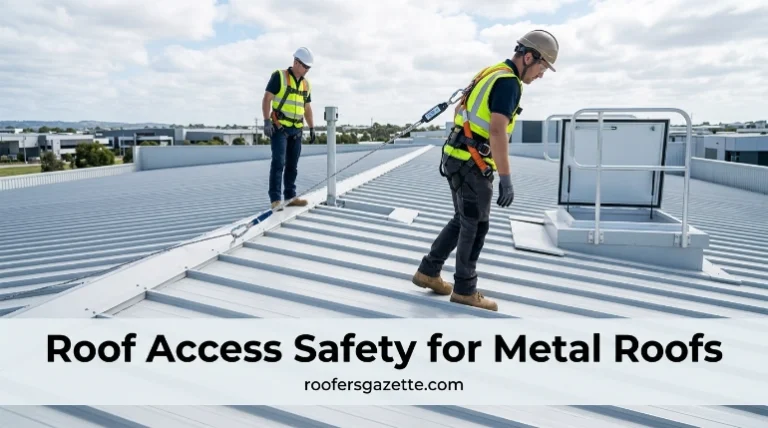
Why Metal Roofs Can Be Especially Slippery
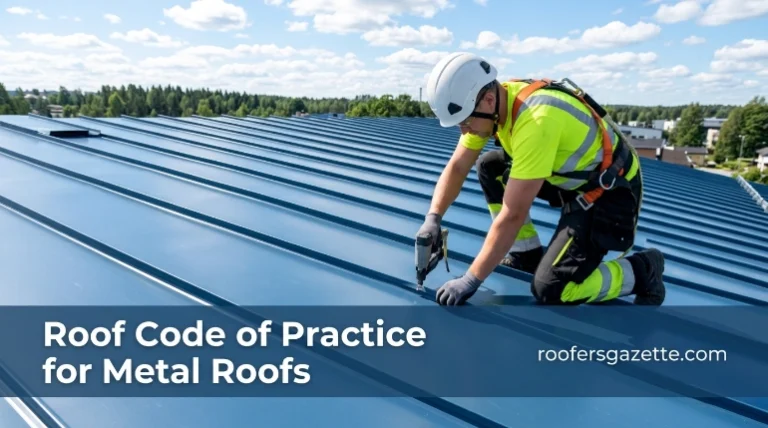
Metal roofing materials commonly include steel, aluminum, copper, and zinc. Their surfaces can be smoother than traditional shingles, particularly when panels have factory-applied coatings.
A surface that feels secure while standing on the ground can become surprisingly slick when your weight is placed on a sloping panel.
Moisture creates one of the biggest problems. A metal roof may be unsafe even when it has not rained. Dew can form overnight, and shaded portions of the roof may remain damp long after sunny sections appear dry.
Pollen and fine dust can also reduce traction.
Wind adds another concern. A sudden gust can affect balance, especially when someone is carrying a tool, moving around an obstruction, or standing near an edge.
If there is any doubt about surface conditions, do not climb onto the roof.
FAQs
Is a safety harness enough for roof work?
No. A safety harness only works when connected correctly to a properly installed roof anchor and lifeline. The entire fall protection system must work together.
Can homeowners legally work on their own roofs?
In many areas, homeowners can perform work on their own homes. However, that doesn’t eliminate the serious safety risks involved. Always prioritize personal safety.
Are steep roofs more dangerous?
Yes. Steeper roofs increase the likelihood of slipping and often require additional safety equipment and specialized techniques.
How often should roof safety equipment be inspected?
Professional safety equipment should be inspected before every use. Damaged harnesses, lanyards, or anchors should never be reused.
Can I inspect my roof after a storm?
You can often perform a visual inspection safely from the ground using binoculars. If you suspect significant damage, schedule a professional inspection instead of climbing onto the roof.
What footwear is safest on a roof?
Professional roofers typically wear slip-resistant roofing shoes designed for traction. Regular athletic shoes may not provide adequate grip on roofing materials.
What roof pitch requires fall protection?
Technically, professionals must use fall protection anytime they are working 6 feet or higher above a lower level, regardless of pitch. For homeowners, it is highly recommended to use fall protection on any sloped roof, even low-slope designs, due to the risk of slipping on debris or morning dew.
Can I use a rock climbing harness for roofing?
No. Rock climbing harnesses are designed for a different type of fall and different body positioning. A roofing fall requires a full-body harness with a dorsal (back) D-ring to keep you upright and distribute the massive shock forces evenly across your chest, shoulders, and legs.
Where do I attach a roof anchor?
A roof anchor must be screwed or nailed directly through the roof decking and into the solid wood of a structural truss or rafter. Securing an anchor only to the plywood or OSB sheathing is incredibly dangerous and will fail in the event of a fall.
How much does a roof fall protection kit cost?
A basic, high-quality residential fall protection kit—which typically includes a universal harness, a reusable roof anchor, a rope lifeline, and a storage bucket—usually costs between $100 and $250. This is a very small investment for life-saving equipment.
Do I need fall protection for a flat roof?
Yes. While you may not slide down a flat roof, tripping over vents, skylights, or tools can easily cause you to fall backward over the edge. Warning lines and safety harnesses are still highly recommended when working near the perimeter of a flat roof.
Can I leave a roof anchor installed permanently?
Yes, some anchors are designed to be permanent. They are usually installed under the ridge cap shingles so that only the connection ring is exposed. However, standard reusable metal brackets should be removed and the screw holes properly sealed with roofing cement to prevent leaks.
Conclusion
Understanding fall protection for roof work helps homeowners make safer decisions before attempting any roofing project. Whether you’re inspecting storm damage, planning repairs, or hiring a contractor, recognizing the importance of proper safety equipment can prevent serious accidents.
For most homeowners, the safest approach is to stay off the roof whenever possible and rely on qualified professionals for repairs, inspections, and replacement work. When evaluating contractors, ask about their fall protection practices, insurance coverage, and safety training. A reputable roofing company won’t hesitate to explain how they protect both their workers and your property.
Making safety your first priority is one of the smartest investments you can make for your home—and for yourself.