
Roof Pitch Tools: How to Choose the Right One for Accurate Slope Measurements

If you measure roofs for a living, pitch is not a side note. It affects estimating, material planning, labor difficulty, and whether a roofing system is even suitable for the slope you’re standing on. For a homeowner, it helps explain why one roof is easy to walk and another feels like climbing a wall. That’s why a good roof pitch tool earns its place in the pouch.
A roof pitch tool is built to tell you how steep a roof is, usually in rise-over-run or degrees. Some are simple manual gauges. Others are digital angle finders or app-based tools that show the reading on a screen. The best choice depends on how often you measure, where you measure from, and how much convenience is worth to you.
What a Roof Pitch Tool Is and Why It Matters
Roof pitch is the roof’s slope expressed as rise over run. In roofing, that usually means how many inches the roof rises for every 12 inches of horizontal run. So a 4/12 roof rises 4 inches for every 12 inches across. That format is common because it matches how roofers think about slope in the field and in estimates.
You’ll also see pitch expressed in degrees. That’s useful if you’re using a digital angle finder or software that reports angle instead of rise-over-run. The two describe the same slope, just in different formats. If you bid work, order materials, or compare roofing systems, you need to understand both.
A roof pitch tool exists to remove guesswork. On a simple repair, that may mean confirming whether a roof is low-slope or steeper than expected. On a larger job, it can affect access planning, labor assumptions, and whether a product is appropriate. InterNACHI notes that some roofing systems have minimum slope requirements, such as 3:12 for certain lapped metal roofs without lap sealant and 0.25:12 for standing-seam systems. That’s not trivia; it’s the difference between a roof system that fits and one that does not. InterNACHI roof slope guidance
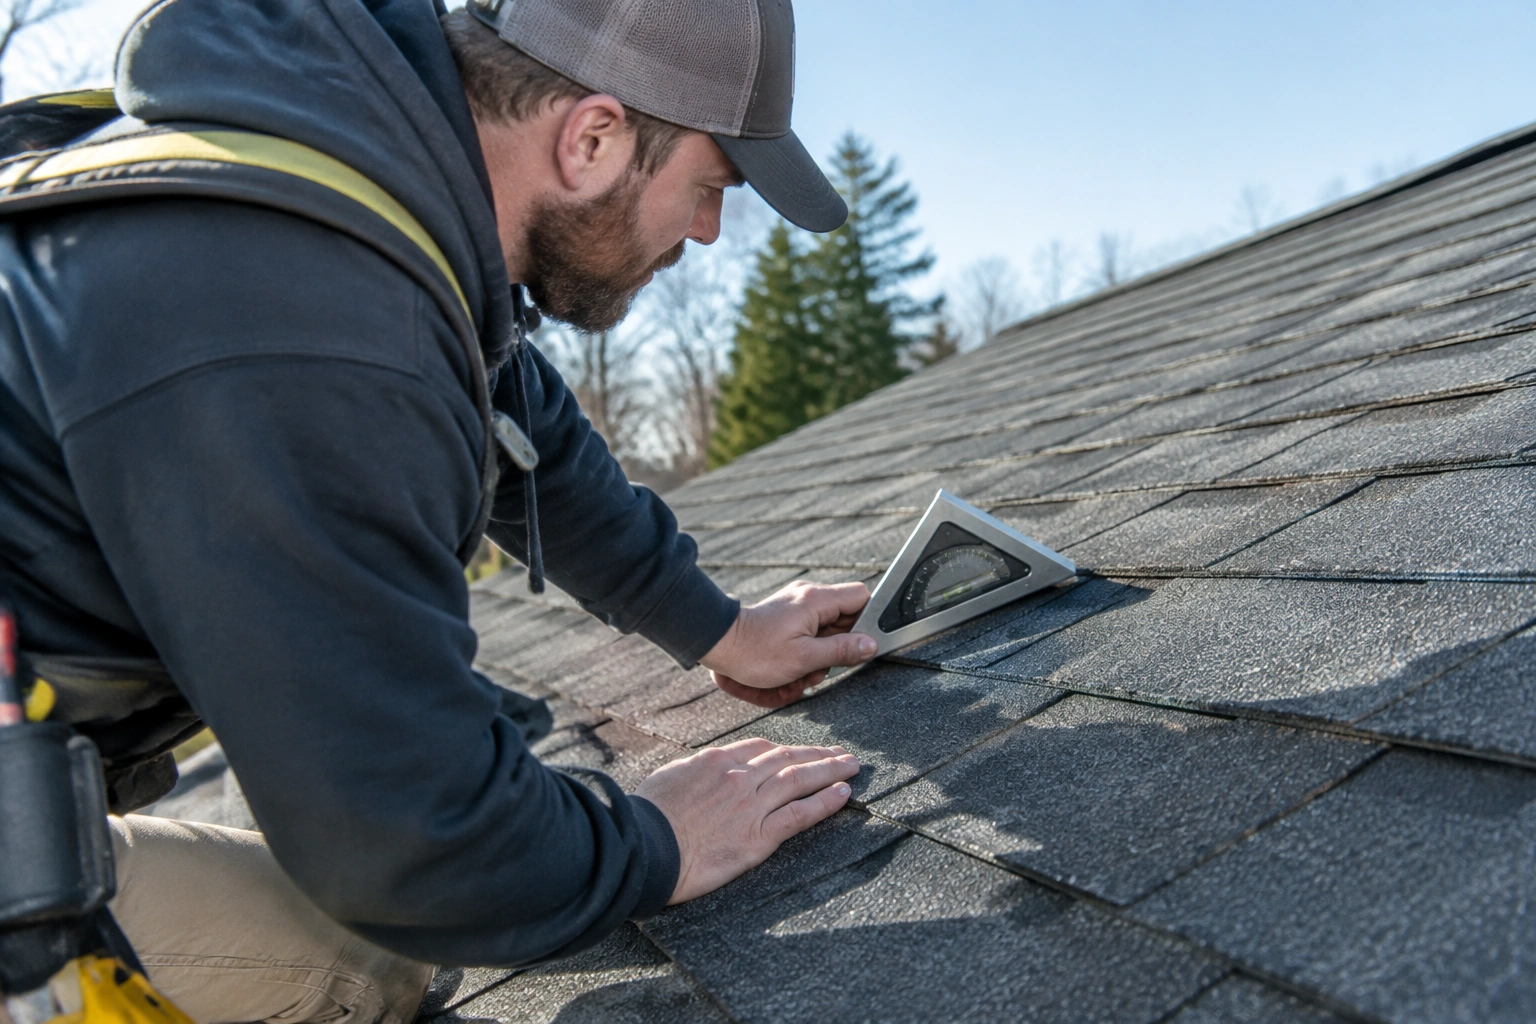
How Roof Pitch Is Measured: Rise-over-Run, Degrees, and Real-World Use
The simplest way to think about pitch is this: rise over run tells you how much height changes over a fixed horizontal distance. Roofing commonly uses a 12-inch run, so a 6/12 roof rises 6 inches over 12 inches of run. That format is easy to compare from one roof to another.
Degrees are more precise in a geometric sense, but not always more useful on a jobsite. A digital tool might show 26.6 degrees, while a roofer thinks of that as roughly 6/12. If you’re estimating or discussing a roof with a crew, the 12-inch format is usually faster. If you’re using a digital tool or app, the degree reading can still be handy when you need a direct angle.
Manual tools usually measure pitch by giving you a visual reference or a direct reading against a level. Digital tools use internal sensors to detect angle. RoofSnap notes that physical pitch tools and levels can measure pitch without a calculator, while mobile pitch-finder apps can do the same digitally. RoofSnap also warns that incorrect placement can lead to inaccurate results, so the tool only works as well as the way you use it. RoofSnap pitch calculator guide
For most roofing decisions, you do not need laboratory-level precision. What you do need is repeatability. If a tool consistently tells you a roof is 6/12 instead of bouncing between 5/12, 6/12, and 7/12, that is usually accurate enough for estimating, material selection, and general job planning. If the work depends on a tighter margin—such as documenting slope for a product specification, comparing multiple readings on a complex roof, or reducing conversion steps in a high-volume estimating workflow—a more precise digital tool is worth considering.
Manual vs Digital Roof Pitch Tools: Which Type Fits Your Work?
Manual and digital tools both have a place. The right one depends on how often you measure and how much you value speed versus simplicity.
Manual roof pitch tools
Manual tools are usually straightforward. Think pitch gauges, pitch cards, speed squares used as pitch references, or a level paired with a tape measure. They do not need batteries, and they tend to be cheaper and less fragile.
That makes them a solid fit for occasional use, especially for DIY homeowners or contractors who only need pitch readings now and then. The trade-off is that they usually take more interpretation. If the roof is awkward to access or your reading position is cramped, a manual tool can be slower to use correctly.
Digital roof pitch tools
Digital angle finders and inclinometer-style tools give you a readout on a screen. That can make them easier to read on steep roofs or in low light, and they’re convenient if you want the measurement in degrees without doing conversion in your head.
The downside is that digital tools add complexity. Batteries matter. Calibration matters. Screen visibility matters. A digital tool can be faster in the hands of someone who uses it often, but it can also create bad readings if it’s not placed correctly or if the user assumes the number is always right without checking setup.
Quick comparison
| Buyer need | Manual tool | Digital tool |
|---|---|---|
| Lowest upfront cost | Better | Worse |
| Fast reading on screen | Worse | Better |
| No batteries needed | Better | Worse |
| Easy to understand | Better | Better, if calibrated |
| Best for frequent estimating | Fair | Better |
| Best for occasional DIY use | Better | Fair |
Key Buying Criteria: Accuracy, Calibration, Durability, and Ease of Use
Accuracy is the first filter, but it is not the only one.
Accuracy that actually matters
For most roofing work, the practical question is whether the tool gives a stable reading that puts the roof in the right slope category. If it consistently lands within the same pitch band—such as clearly identifying a roof as 4/12, 6/12, or 8/12—that is usually enough for estimating and common material decisions. If the reading varies enough to change the category, it becomes a problem.
Calibration and setup
Digital tools should be checked for calibration or zeroing according to the manufacturer’s instructions. If the tool is out of calibration, the display can look professional while still being wrong. That is a common trap: a screen does not guarantee accuracy. For manual tools, the equivalent issue is user setup—if the level, square, or tape is placed inconsistently, the result is just as unreliable.
Durability and weather resistance
Roof tools get dropped, bumped, and exposed to dust, moisture, and sun. A fragile tool may work fine on a clean bench and fail on a roof. Look for a body that feels solid, a display you can read outdoors, and controls that still work with gloves on. If a tool has moving parts, ask whether they feel tight or sloppy.
Ease of use on the roof
A tool that is easy to read on a table may be annoying on a ladder. Size matters. So does grip. A compact tool is easier to carry, but a slightly larger one may be easier to place and read. On steep roofs, less fumbling is better than more features.
Roof Pitch Tool vs Speed Square vs Level and Tape Measure
If you already own a speed square or a level and tape measure, you may not need a dedicated pitch tool for every job.
Speed square
A speed square can help identify roof pitch and rafter angle, especially if you already know how to use one. It is cheap, rugged, and already familiar to many roofers. The downside is that it is more manual and more dependent on the user reading it correctly.
Level and tape measure
This is the classic method. It is inexpensive and accurate enough when used correctly. The trade-off is time and access. You need the right setup, the right placement, and enough room to measure without fighting the roof geometry.
Dedicated roof pitch tool
A dedicated tool wins when speed and repeatability matter. If you measure pitch often, a purpose-built tool reduces fiddling. If you only measure a few roofs a year, a speed square or level may be enough.
A practical rule: if pitch measurement is part of your estimating workflow, buy the tool that removes steps. If you only need to confirm slope once in a while, use the tools you already own unless they slow you down enough to cause mistakes.
Best Roof Pitch Tool for Contractors, Estimators, and DIY Homeowners
Contractors
Best choice: a durable digital pitch tool or inclinometer-style device.
Contractors usually benefit most from speed, repeatability, and easy documentation. If you measure pitch often, the time savings from a screen-based tool usually outweigh the higher upfront cost.
Estimators and sales reps
Best choice: a midrange digital tool or software-assisted workflow.
Estimators often need quick readings, clear documentation, and enough consistency to support bids. A digital tool is worth it when you are measuring often enough that repeated setup time starts to matter.
DIY homeowners
Best choice: a simple manual pitch tool, speed square, or basic digital angle finder.
Most homeowners do not need a premium workflow. A simple tool is usually enough for repairs, shed projects, or checking whether a roof looks steeper than expected.
RoofSnap also notes that a virtual pitch card can measure pitch remotely using aerial and street view imagery, so you do not always need to be onsite. That can be useful for early estimating, but onsite confirmation still matters when the job is complex or access is limited. RoofSnap remote pitch measurement
Steep Roofs, Low-Slope Roofs, and Other Use-Case Considerations
Steep roofs punish awkward tools. If the roof is hard to stand on, you want a tool that is easy to place quickly and read without extra movement. Large, clumsy tools are more trouble than they are worth up there.
Low-slope roofs create a different problem: tiny changes in angle matter more, and some tools are harder to position accurately on flatter surfaces. In those cases, a stable digital tool or a carefully used level-based method can be better than a bulky accessory.
If your work includes both steep and low-slope roofs, avoid buying a tool that only performs well in one direction. Check the intended use case before you buy. A tool that is perfect on a 10/12 roof may be awkward on a 1/4:12 roof.
Price and Value: What to Expect at Different Budget Levels
I would think about price in three buckets.
- Budget: about $10 to $30 — basic manual tools, pitch gauges, or simple speed-square-style options. Best for occasional use and homeowners.
- Midrange: about $30 to $100 — better-built manual tools or entry-level digital angle finders. Good balance for small contractors and serious DIYers.
- Professional-grade: about $100 to $300+ — rugged digital tools, specialty measuring tools, or software-linked workflows. Best when pitch measurement is part of your daily work.
Do not pay extra for features you will not use. A flashy display does not help if the tool is hard to place. On the other hand, saving a few dollars on a tool that reads poorly in sunlight is false economy if you use it every week.
For broader estimating context, roof pitch can affect replacement cost because it influences material needs and labor difficulty. If you want the full estimating picture, see our guide on how roof pitch affects replacement cost.
Safety and Usability Tips for Measuring Roof Pitch
Measuring pitch should never become the risky part of the job. Use stable footing, keep your movement deliberate, and do not chase a reading while standing in a bad position.
If you can measure from a ladder or from the ground with a suitable tool or remote method, that may be safer than walking a roof that does not need to be climbed. The method matters as much as the tool. Incorrect placement can throw off the reading.
If you are on the roof, keep the tool simple enough that it does not distract you. You are there to get a reading, not to wrestle with controls. Gloves, glare, wind, and dusty shingles all make fiddly tools worse.
For general fall protection and roof work practices, OSHA is still the baseline reference for jobsite safety. OSHA fall protection resources
How to Choose the Right Roof Pitch Tool
Use this decision framework:
-
How often will you measure pitch?
Occasional use favors a manual tool. Frequent use favors a digital one. -
Where will you measure from?
If you often work on steep roofs, prioritize readability and easy placement. If you can measure from the ground or remotely in some cases, software-based options may be worth a look. -
What format do you need?
If you think in 4/12 and 6/12, make sure the tool supports rise-over-run clearly. If your workflow uses degrees, choose a tool that displays degrees without extra conversion. -
How much durability do you need?
A homeowner can live with a lighter-duty tool. A contractor should expect jobsite abuse and buy accordingly. -
What is your real budget?
Buy the simplest tool that still saves time and reduces mistakes.
That framework usually leads to one of three answers: a basic manual pitch tool, a midrange digital angle finder, or a software-assisted workflow for estimating teams.
Common Mistakes to Avoid When Buying a Roof Pitch Tool
The biggest mistake is buying for features instead of use. If you only need a few roof readings a year, a premium digital tool may be overkill.
The next mistake is assuming digital means accurate. A digital display is only as good as the calibration and placement behind it.
Another common error is choosing a tool that does not match your roof types. Low-slope work and steep-slope work can require different handling, so make sure the tool is stable where you actually use it.
Finally, do not ignore readability. A tool that looks great online may be hard to read in bright sun or with gloves on.
When to Call a Roofing Pro
If the roof is too steep to access safely, if the slope seems unusual, or if you need pitch information for a larger estimating or replacement decision, bring in a roofing pro. A good estimator can confirm pitch, identify slope-related limitations, and help you avoid buying the wrong system for the roof.
That is especially true when pitch affects product compatibility or labor planning. A quick reading is useful. A wrong reading can cost real money.
Frequently Asked Questions About Roof Pitch Tools
What is the easiest way to measure roof pitch?
For many users, the easiest method is a dedicated pitch tool or a digital angle finder. If you already know how to use a speed square or a level and tape measure, those can work too.
Is a digital roof pitch tool worth it?
Yes, if you measure often and want faster readings or a screen-based display. If you only check pitch occasionally, a manual tool may be enough.
Can I measure roof pitch from the ground?
Sometimes. Remote or app-based tools can estimate pitch from imagery, and some software offers virtual pitch cards. That can be useful for initial estimating, but onsite confirmation is still wise when accuracy matters.
What accuracy do I really need?
Usually, enough to classify the roof correctly and support the job. You do not need lab precision for most roofing decisions, but you do need repeatable readings.
Do I need pitch in degrees or rise-over-run?
Both can be useful. Roofers often speak in rise-over-run, while digital tools and apps may show degrees. Choose the format that matches your workflow and estimate process.
Can one tool handle steep and low-slope roofs?
Some can, but not all do well in both situations. Check the intended use case and choose a form factor that stays readable and stable on the roofs you actually work on.
How much should I spend?
Enough to get a tool that is accurate, readable, and durable for your use level. Occasional homeowners usually do not need a premium tool. Frequent contractors often do.
Is a roof pitch tool better than a level and tape measure?
If you measure pitch often, yes, because it can save time and reduce setup steps. If you only need a reading once in a while, the level-and-tape method may still be the best value.