
How to Install Furring Strips for Metal Roof: A Step-by-Step Homeowner’s Guide

Installing a metal roof over an existing structure can improve durability, energy efficiency, and curb appeal—but only when it’s done correctly. One of the most important steps is learning how to install furring strips for metal roof systems properly. Furring strips create a level surface, improve ventilation, and provide secure attachment points for metal panels.
In this guide, you’ll learn when furring strips are needed, the tools and materials required, step-by-step installation instructions, common mistakes to avoid, and when it’s safer to hire a roofing professional.
Quick Answer
To install furring strips for a metal roof, inspect the roof deck, repair any damage, locate the rafters, install pressure-treated 1×4 or 2×4 furring strips perpendicular to the rafters using appropriate fasteners, maintain consistent spacing, and verify the surface is level before attaching metal roofing panels. Proper spacing and secure fastening help improve roof performance and longevity.
What Are Furring Strips?
Furring strips are narrow pieces of lumber fastened to a roof deck before installing metal roofing panels. They create a raised framework that supports the metal panels while allowing airflow beneath the roofing material.
Homeowners commonly use:
- Pressure-treated 1×4 boards
- Pressure-treated 2×4 boards
- Engineered wood battens (when specified by the manufacturer)
These strips help provide:
- Better panel support
- Improved ventilation
- Reduced moisture buildup
- Easier installation over uneven roof decks
- A level fastening surface
Why Install Furring Strips Under a Metal Roof?
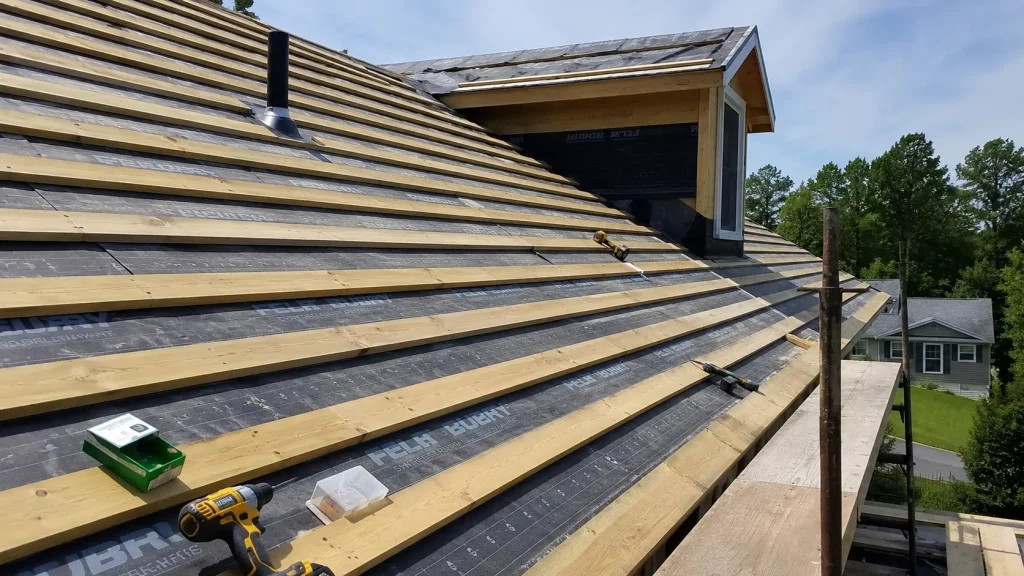
Although some metal roofing systems install directly over solid decking, many applications benefit from furring strips.
Advantages include:
- Creates ventilation space beneath the panels
- Reduces condensation problems
- Helps level uneven roofs
- Makes replacing damaged decking easier later
- Can improve energy efficiency by allowing heat to dissipate
The U.S. Department of Energy explains that proper roof ventilation helps reduce heat buildup and moisture issues that can shorten roof life. See the Department of Energy guide on cool roofs and roof efficiency.
When Are Furring Strips Recommended?
Furring strips are commonly recommended when:
- Installing metal roofing over an existing shingle roof (where permitted by local building codes)
- Roof decking is uneven
- Additional ventilation is desired
- The roofing manufacturer specifies battens
- Retrofitting older homes
However, some standing seam roofing systems require solid decking instead. Always follow the manufacturer’s installation instructions.
Tools and Materials You’ll Need
Before beginning, gather the necessary tools.
| Item | Purpose |
|---|---|
| Pressure-treated 1×4 or 2×4 lumber | Furring strips |
| Tape measure | Accurate layout |
| Chalk line | Straight installation |
| Circular saw | Cutting lumber |
| Drill/driver | Installing fasteners |
| Exterior-grade screws | Secure attachment |
| Level | Check alignment |
| Safety harness | Fall protection |
| Ladder | Roof access |
| Safety glasses and gloves | Personal protection |
Safety Warning: Roofing work involves significant fall hazards. Review the OSHA residential roofing safety guidance before starting any roof project.
Inspect the Roof Before Installing Furring Strips
Never install furring strips over damaged decking.
Check for:
- Soft spots
- Water damage
- Rot
- Loose sheathing
- Structural sagging
- Mold
- Loose fasteners
Repair any structural problems before continuing.
A strong base ensures the entire roofing system performs as intended.
How to Install Furring Strips for Metal Roof
Step 1: Measure the Roof
Measure:
- Roof length
- Roof width
- Roof slope
- Rafter spacing
These measurements determine how much lumber you’ll need.
Step 2: Locate the Rafters
Use:
- Stud finder
- Existing nail patterns
- Attic measurements
Fastening directly into rafters provides the strongest installation.
Step 3: Snap Chalk Lines
Mark straight reference lines across the roof.
Typical spacing ranges from:
- 16 inches on center
- 24 inches on center
Always follow the metal roofing manufacturer’s recommended spacing.
Step 4: Cut the Furring Strips
Trim boards to fit roof dimensions.
Avoid warped or cracked lumber.
Pressure-treated lumber generally offers better resistance to moisture.
Step 5: Install the First Strip
Begin at the roof edge.
Position the first strip square with the eave.
Fasten securely into every rafter.
Use corrosion-resistant exterior screws designed for roofing applications.
Step 6: Continue Installing Remaining Strips
Work upward toward the ridge.
Check:
- Alignment
- Spacing
- Levelness
A chalk line helps maintain straight rows.
Even spacing prevents panel waviness later.
Step 7: Verify Everything Is Level
Use a long level or straightedge.
Correct any uneven areas before installing metal panels.
A flat framework produces a cleaner finished roof.
Expert Tip
Expert Tip: Before fastening every row permanently, dry-fit several metal panels across the furring strips. This simple check helps confirm spacing, alignment, and panel coverage before it’s too late to make easy adjustments.
Recommended Furring Strip Spacing
| Roof Type | Typical Spacing |
|---|---|
| Corrugated metal panels | 24 inches on center |
| Standing seam systems | Follow manufacturer specifications |
| Heavy snow regions | 16 inches on center (often recommended) |
| High-wind areas | Closer spacing may be required |
Always verify spacing requirements in the manufacturer’s installation manual.
Safety Considerations
Working on roofs involves serious risks.
Follow these basic precautions:
- Wear non-slip footwear.
- Use fall protection.
- Never work during rain or high winds.
- Secure ladders properly.
- Avoid working alone.
- Keep power cords organized.
- Stay clear of overhead electrical lines.
The National Roofing Contractors Association also recommends using manufacturer-approved installation methods to maximize roof performance.
DIY vs Hiring a Professional
| DIY Installation | Professional Installation |
|---|---|
| Lower labor cost | Higher upfront cost |
| Flexible schedule | Faster completion |
| Requires roofing knowledge | Experienced workmanship |
| Higher risk of mistakes | Often includes workmanship warranty |
| Best for simple projects | Best for complex roofs |
When to Call a Roofing Professional
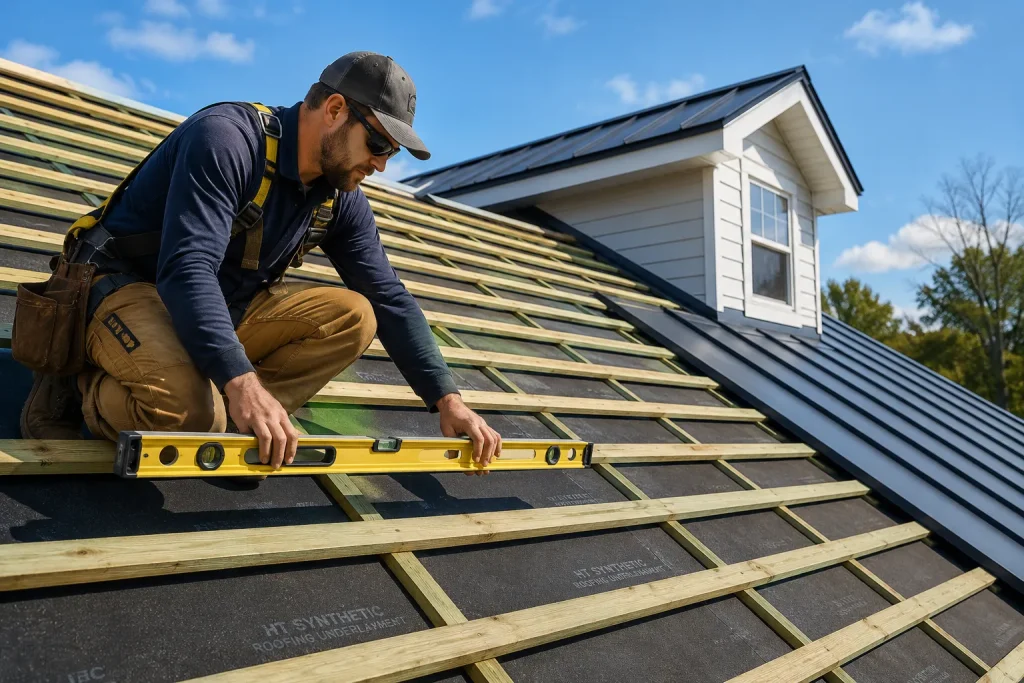
Some roofing jobs are beyond a typical DIY project.
Hire a qualified roofing contractor if:
- The roof is steep.
- Structural damage is present.
- Decking requires replacement.
- Local codes require professional installation.
- The roof has multiple valleys or dormers.
- You’re unfamiliar with fall protection.
- Manufacturer warranty requires certified installation.
Professional installation can help prevent expensive mistakes that may reduce the lifespan of your new metal roof.
Common Mistakes Homeowners Should Avoid
- Installing over damaged roof decking
- Using untreated lumber that can rot
- Ignoring manufacturer spacing requirements
- Missing rafters with fasteners
- Installing uneven furring strips
- Using interior screws instead of exterior-rated fasteners
- Skipping roof inspection before installation
- Working without fall protection
- Failing to account for local building codes
- Installing panels before verifying alignment
FAQs
Do all metal roofs require furring strips?
No. Some metal roofing systems install directly over solid decking, while others require battens or furring strips. Always follow the manufacturer’s installation instructions.
What size lumber should I use for furring strips?
Pressure-treated 1×4 boards are the most common choice, although some projects use 2×4 lumber depending on design requirements and local building codes.
Can I install furring strips over existing shingles?
Sometimes. Local building codes and the roofing manufacturer’s recommendations determine whether this installation method is acceptable.
How far apart should furring strips be?
Most installations use spacing between 16 and 24 inches on center, but exact spacing depends on the roofing system, climate, and manufacturer specifications.
Can uneven furring strips damage a metal roof?
Yes. Uneven strips can create panel waves, loose fasteners, water drainage issues, and premature wear.
Should I use nails or screws?
Exterior-grade corrosion-resistant screws generally provide stronger holding power and are commonly recommended for fastening furring strips.
Conclusion
Knowing how to install furring strips for metal roof systems is an important step toward a durable, long-lasting roofing installation. Proper planning, careful measurements, quality materials, and secure fastening all contribute to a roof that performs well for decades. While many experienced DIY homeowners can complete straightforward installations, complex roofs, structural concerns, or safety risks often justify hiring a professional. Taking the time to install furring strips correctly helps protect your investment and provides a solid foundation for your new metal roof.