
How to Install a Cupola on a Metal Roof: A Complete Homeowner’s Guide

Installing a cupola can dramatically improve the appearance of your home while also helping with attic ventilation—if it’s installed correctly. Many homeowners wonder how to install a cupola on a metal roof without causing leaks, damaging the roofing panels, or shortening the roof’s lifespan.
The good news is that installing a cupola on a metal roof is possible with the right planning, proper flashing, and careful attention to waterproofing. In this guide, you’ll learn how the installation process works, what tools and materials you’ll need, common mistakes to avoid, safety considerations, estimated costs, and when it’s best to hire a roofing professional.
Quick Answer
To install a cupola on a metal roof, first determine the correct location, measure the roof pitch, prepare the roof opening (if ventilation is needed), install a properly flashed curb, secure the cupola to the curb, seal all penetrations, and inspect the installation for leaks. Proper flashing and waterproofing are essential to prevent future roof damage.
What Is a Cupola?
A cupola is a small roof structure placed near the ridge of a roof. While many homeowners install one for curb appeal, some cupolas are functional and improve attic ventilation.
Cupolas can be made from:
- Vinyl
- Wood
- Aluminum
- Copper
- Composite materials
On a metal roof, the installation method differs from asphalt shingles because metal expands and contracts with temperature changes. The flashing system must allow for movement while remaining watertight.
Can You Install a Cupola on a Metal Roof?
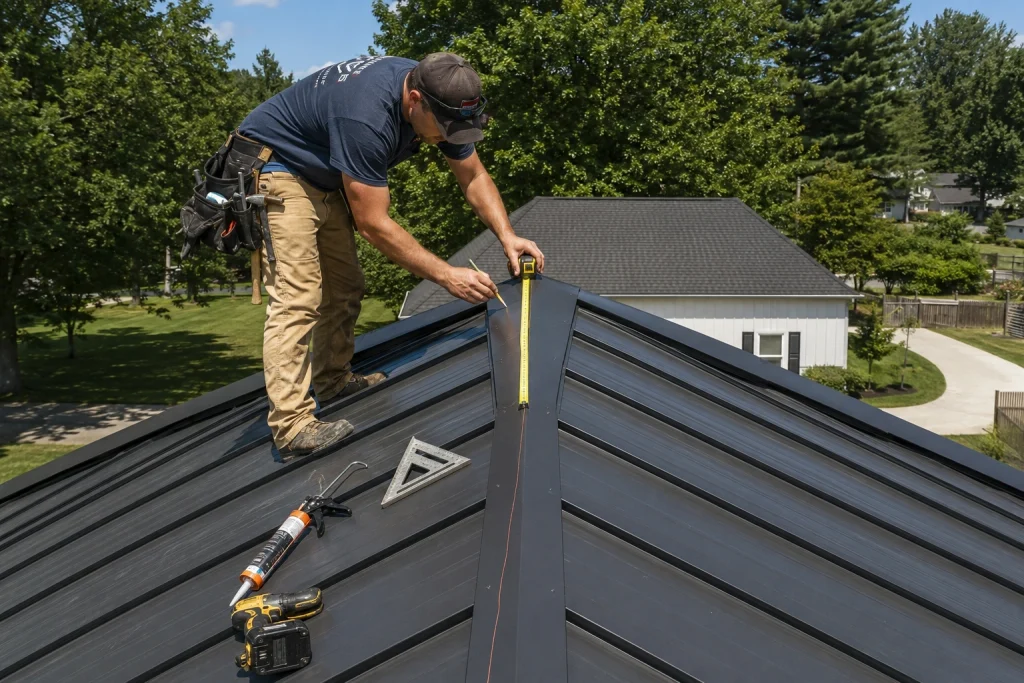
Yes.
Modern standing seam and exposed fastener metal roofs can both support a properly installed cupola.
However, success depends on:
- Correct roof measurements
- Proper curb construction
- Manufacturer-approved flashing
- Waterproof sealing
- Correct fastener placement
According to the Metal Construction Association’s roofing resources, following manufacturer-approved installation methods helps maintain roof performance and longevity.
Benefits of Installing a Cupola
A properly installed cupola offers several advantages.
Better Curb Appeal
A decorative cupola creates a more attractive roofline and can increase perceived home value.
Improved Ventilation
Ventilated cupolas help remove:
- Heat
- Moisture
- Humid air
This can reduce attic temperatures during summer.
For more information about attic ventilation, the U.S. Department of Energy’s guidance on home ventilation explains how proper airflow improves energy efficiency.
Natural Lighting
Some cupolas include windows that allow natural light into garages, barns, workshops, or attic spaces.
Architectural Character
Cupolas complement:
- Farmhouses
- Barn-style homes
- Colonial homes
- Modern country homes
Tools and Materials You’ll Need
Before starting, gather everything you’ll need.
Tools
- Tape measure
- Drill/driver
- Circular saw
- Jigsaw
- Metal cutting tools
- Level
- Chalk line
- Caulking gun
- Safety harness
- Ladder
Materials
- Cupola
- Pressure-treated lumber for curb
- Self-drilling metal roofing screws
- Butyl tape
- High-quality roofing sealant
- Metal flashing
- Ice and water shield (where recommended)
- Underlayment patches if required
Always verify the cupola manufacturer’s installation instructions before cutting into the roof.
Safety Comes First
Working on a metal roof can be dangerous.
Metal roofing becomes extremely slippery when:
- Wet
- Frosty
- Dusty
- Covered with pollen
Before beginning, review the OSHA residential fall protection guidance and use appropriate fall-protection equipment.
Never attempt this project during rain or high winds.
How to Install a Cupola on a Metal Roof
Step 1: Choose the Correct Location
Most cupolas are centered along the roof ridge.
Measure carefully from both roof ends to ensure the cupola is perfectly centered.
A misplaced cupola is immediately noticeable from the ground.
Step 2: Measure the Roof Pitch
Cupolas are designed for specific roof slopes.
Common pitches include:
- 4/12
- 6/12
- 8/12
- 10/12
Many manufacturers offer adjustable bases that match different roof pitches.
Step 3: Build or Install the Roof Curb
The curb serves as the structural base.
It should:
- Match the roof angle
- Be securely attached to framing
- Provide a level mounting surface
A properly built curb also supports the flashing system.
Step 4: Mark the Roof Opening
Only ventilated cupolas require an opening.
Carefully mark the opening between roof framing members.
Avoid cutting roof trusses or rafters without engineering approval.
Step 5: Cut the Roof Opening
After removing the necessary roofing panels (if required), carefully cut the decking.
Keep cuts straight and clean.
Remove debris before continuing.
Step 6: Install Waterproofing
This is one of the most important steps.
Install:
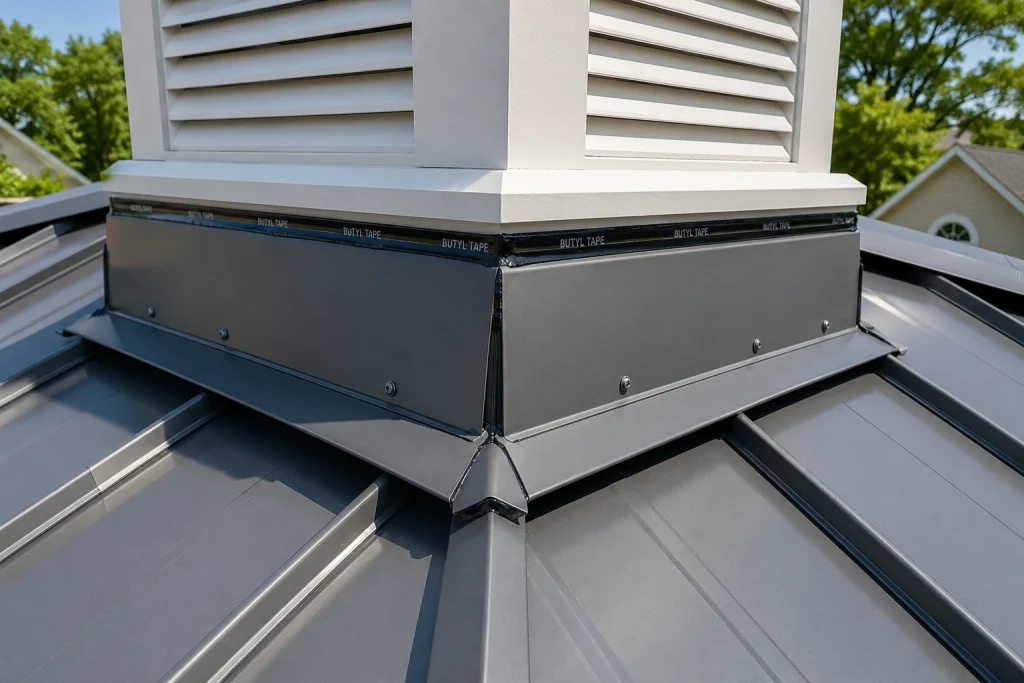
- Butyl tape
- Flashing
- Waterproof membrane where recommended
- Sealant at critical joints
Poor flashing—not the cupola itself—is the most common cause of leaks.
Step 7: Secure the Cupola
Place the cupola over the curb.
Fasten it according to manufacturer specifications.
Avoid overtightening screws, which can deform metal roofing panels.
Step 8: Seal Every Penetration
Apply roofing-grade sealant around:
- Fasteners
- Flashing edges
- Seams
- Trim joints
Inspect every joint before finishing.
Step 9: Final Inspection
Check for:
- Loose fasteners
- Uneven flashing
- Missing sealant
- Proper alignment
- Smooth water drainage
Spray the roof with a garden hose to simulate rainfall and inspect for leaks inside.
DIY vs Professional Installation
| Factor | DIY Installation | Professional Installation |
|---|---|---|
| Cost | Lower upfront cost | Higher labor cost |
| Leak Risk | Moderate to high | Lower when installed correctly |
| Warranty Protection | May affect roof warranty | Often preserves warranty requirements |
| Installation Time | Full weekend or longer | Usually completed in one day |
| Safety | Higher personal risk | Professional safety equipment |
| Best For | Experienced DIY homeowners | Most homeowners |
How Much Does It Cost?
Costs vary depending on cupola size, roof type, and labor rates.
| Item | Estimated Cost |
|---|---|
| Decorative cupola | $200–$800 |
| Functional ventilated cupola | $500–$2,000+ |
| Professional installation | $500–$1,500 |
| Custom flashing | $100–$400 |
| Sealants and fasteners | $50–$150 |
Complex roofs or custom copper cupolas can increase total project costs.
Expert Tip
Expert Tip: Before cutting into a metal roof, contact both the roofing manufacturer and the cupola manufacturer to confirm that your installation method won’t void the roof warranty. Matching the recommended flashing system to your roofing profile can prevent expensive leak repairs later.
Common Installation Challenges
Metal roofs behave differently than asphalt shingles.
Common challenges include:
- Roof movement from thermal expansion
- Matching flashing to panel profiles
- Waterproofing around ribs
- Working safely on slippery panels
- Maintaining roof warranties
Understanding these issues before installation helps prevent expensive repairs later.
When to Call a Roofing Professional
Although experienced DIY homeowners can install some cupolas, professional help is recommended if:
- Your roof is steep.
- The cupola requires structural framing changes.
- You need to cut roof trusses or rafters.
- Your metal roof has a complex standing seam profile.
- The roof is under warranty.
- You are uncomfortable working at heights.
- You notice existing roof damage or leaks.
Hiring a qualified roofing contractor can reduce the risk of water intrusion and ensure the installation meets local building codes.
Common Mistakes Homeowners Should Avoid
- Installing the cupola off-center on the roof ridge.
- Skipping flashing or relying only on caulk.
- Cutting structural framing without approval.
- Using indoor-grade sealants instead of roofing products.
- Overtightening screws into metal panels.
- Ignoring roof pitch compatibility.
- Working on a wet or icy metal roof.
- Failing to test for leaks after installation.
- Not checking manufacturer warranty requirements before modifying the roof.
FAQs
Do all cupolas require cutting a hole in the roof?
No. Decorative cupolas can often be mounted without creating a roof opening. Ventilated cupolas typically require an opening to allow airflow.
Can I install a cupola on an existing metal roof?
Yes. Most cupolas can be installed on existing metal roofs, provided the flashing and mounting system are compatible with the roof profile.
Will installing a cupola cause roof leaks?
Not if it’s installed correctly. Proper flashing, sealants, and waterproofing are essential to keep the roof watertight.
How long does cupola installation take?
A simple installation may take one day, while larger or custom installations can require two or more days.
Does a cupola improve attic ventilation?
A ventilated cupola can improve airflow when it’s part of a balanced ventilation system that also includes adequate intake vents.
Can heavy snow damage a cupola?
A properly installed, well-supported cupola is designed to withstand normal snow loads. However, areas with heavy snowfall should follow local building code requirements.
Do I need a permit to install a cupola?
Permit requirements vary by location. Check with your local building department before starting any project that modifies your roof structure.
Conclusion
Learning how to install a cupola on a metal roof starts with careful planning, accurate measurements, and a commitment to proper waterproofing. While the project can enhance your home’s appearance and even improve attic ventilation, mistakes with flashing or structural modifications can lead to costly leaks and repairs.
If you’re confident with roofing work, follow manufacturer instructions carefully and prioritize safety at every step. For steep roofs, complex metal roofing systems, or projects that involve structural changes, hiring an experienced roofing professional is often the smartest investment. A properly installed cupola will provide years of beauty, performance, and protection for your home.