
How to Install Snow Guards on Metal Roof: A Complete Homeowner’s Guide

Introduction
A metal roof is excellent at shedding snow, but that’s not always a good thing. When large sheets of snow slide off at once, they can damage gutters, landscaping, vehicles, HVAC equipment, or even injure people standing below. That’s why many homeowners ask how to install snow guards on metal roof systems safely and correctly.
Installing snow guards isn’t just about attaching a few pieces of metal to your roof. Proper placement, spacing, roof type, snow load, and installation method all affect how well they perform. In this guide, you’ll learn how snow guards work, where they should be installed, common mistakes to avoid, when DIY installation makes sense, and when it’s safer to hire a professional.
Quick Answer
To install snow guards on a metal roof, first identify your roof panel type, choose compatible snow guards, plan the layout based on roof size and local snow loads, then install them using manufacturer-approved clamps or adhesive systems. Never drill into standing seam panels unless the roofing manufacturer specifically allows it, as improper installation can void warranties and create leaks.
Why Snow Guards Matter on Metal Roofs
Metal roofs have a smooth surface that allows snow to slide off much more easily than asphalt shingles.
While this helps reduce roof weight during winter, it also creates the risk of a sudden snow avalanche.
Snow guards help by:
- Preventing large sheets of snow from sliding off at once
- Protecting gutters from damage
- Reducing the risk of injuries
- Protecting vehicles and walkways
- Helping snow melt gradually
According to the International Code Council, building practices should account for local environmental conditions, including snow loads in applicable regions.
How Snow Guards Work
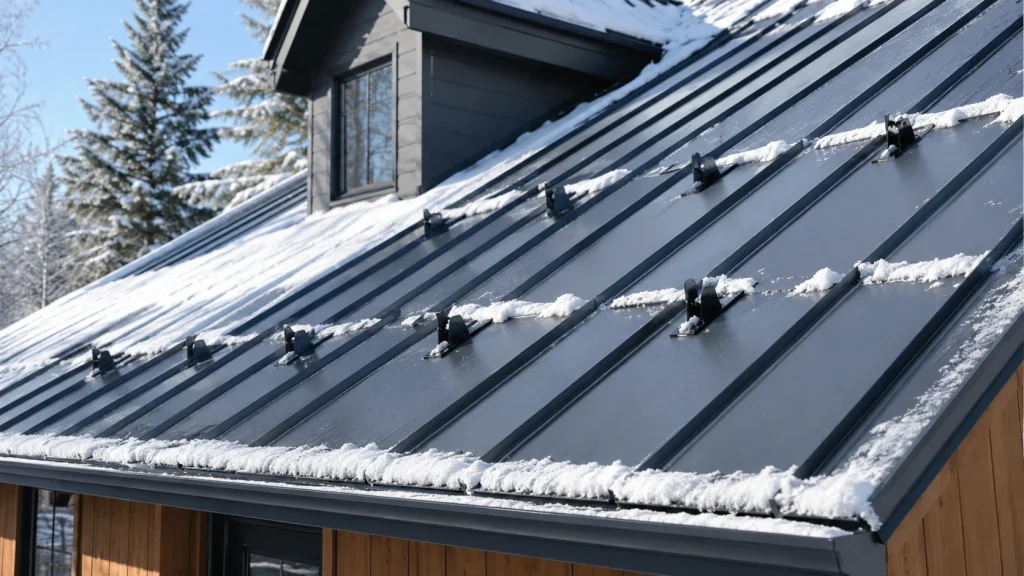
Snow guards create small barriers that hold snow in place.
Instead of allowing one massive sheet to slide off, they break the snow into smaller sections that melt gradually.
There are several common designs:
- Individual pad-style snow guards
- Pipe-style snow retention systems
- Fence-style systems
- Continuous rail systems
Each works differently depending on your roof slope, snow accumulation, and roofing profile.
Types of Metal Roofs and Compatible Snow Guards
| Metal Roof Type | Recommended Snow Guard |
|---|---|
| Standing seam | Clamp-on snow guards (no drilling) |
| Corrugated panels | Screw-mounted snow guards |
| Exposed fastener panels | Fastened snow guards with sealant |
| Ribbed metal panels | Profile-specific snow guards |
Always purchase snow guards designed specifically for your roofing profile.
Choosing the Right Snow Guards
Before installation, consider several factors.
Roof Pitch
Steeper roofs require more snow retention because snow slides faster.
Local Snowfall
Homes in northern climates usually require more snow guards than homes with occasional snowfall.
The National Weather Service winter safety guidance explains how snow accumulation varies significantly across different regions.
Roof Length
Longer roof sections generate greater sliding force.
Roof Material
Aluminum, steel, copper, and zinc roofs may require different attachment methods.
Tools and Materials You’ll Need
Depending on your roof type, you’ll typically need:
- Compatible snow guards
- Tape measure
- Chalk line
- Marker
- Ladder
- Safety harness
- Work gloves
- Manufacturer-approved adhesive (if required)
- Torque wrench (for clamp systems)
- Sealant (when specified)
Always follow the manufacturer’s installation instructions.
Safety First Before Starting
Roof work is dangerous.
According to OSHA’s residential construction safety guidance, falls remain one of the leading causes of serious injuries during roofing work.
Before climbing onto your roof:
- Wear non-slip footwear.
- Use a properly secured ladder.
- Wear a fall-protection harness.
- Avoid working during snow, ice, rain, or high winds.
- Never work alone.
If you’re uncomfortable working at heights, hire a qualified roofing contractor.
Step-by-Step: How to Install Snow Guards on Metal Roof
Step 1: Identify Your Roof Panel
Determine whether your roof is:
- Standing seam
- Corrugated
- Ribbed
- Exposed fastener
This determines which installation method you should use.
Step 2: Review Manufacturer Recommendations
Not every snow guard works with every roof.
Check:
- Panel compatibility
- Maximum spacing
- Clamp torque values
- Adhesive curing times
- Warranty requirements
Following manufacturer guidelines helps protect both your roof and your warranty.
Step 3: Plan the Layout
Proper spacing matters more than many homeowners realize.
Snow guards should usually be installed:
- Above entrances
- Over garages
- Above walkways
- Above driveways
- Above decks
- Above HVAC equipment
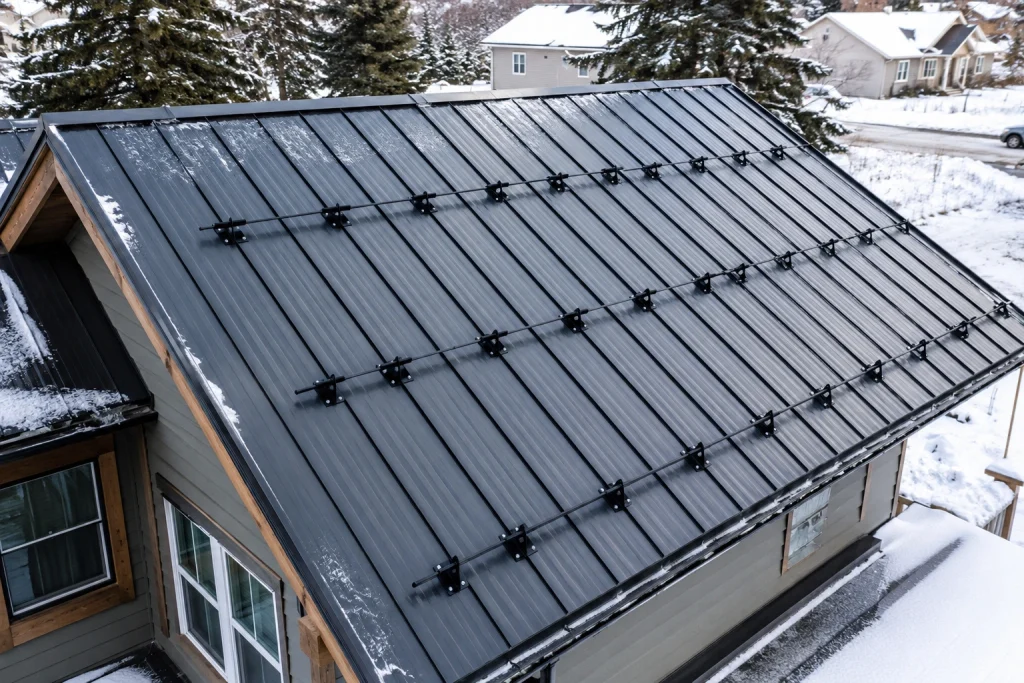
Large roofs often require multiple rows instead of a single line.
Step 4: Mark Installation Points
Use a chalk line to create straight rows.
Double-check spacing before attaching any guards.
Uneven spacing reduces effectiveness and can overload individual snow guards.
Step 5: Install the Snow Guards
The installation process depends on your roof.
Clamp-On Standing Seam Systems
- Position the clamp over the seam.
- Tighten bolts to the manufacturer’s specified torque.
- Do not overtighten.
- Do not drill through the standing seam unless explicitly approved.
Screw-Mounted Systems
- Align the guard with the panel profile.
- Install fasteners in the recommended locations.
- Use manufacturer-approved sealing washers.
- Apply sealant if required.
Adhesive Systems
- Clean the panel thoroughly.
- Apply the approved adhesive.
- Press the guard firmly into place.
- Allow the adhesive to cure completely before exposure to snow.
Step 6: Inspect Your Work
After installation:
- Verify alignment.
- Check bolt torque.
- Inspect adhesive coverage.
- Ensure guards are securely attached.
- Remove any installation debris.
A final inspection can prevent problems once winter weather arrives.
DIY vs Professional Installation
| DIY Installation | Professional Installation |
|---|---|
| Lower upfront cost | Higher initial cost |
| Suitable for experienced homeowners | Best for steep or complex roofs |
| Requires roof safety equipment | Contractor provides equipment |
| Risk of mistakes | Lower installation risk |
| May affect warranty | Often maintains warranty compliance |
Expert Tip:
Instead of installing just one row of snow guards near the roof edge, many metal roof systems perform better with multiple staggered rows. This spreads snow loads more evenly and reduces stress on individual guards.
Where Snow Guards Should Be Installed
Prioritize areas where falling snow could cause damage.
Install snow guards above:
- Front entrances
- Side doors
- Patios
- Decks
- Walkways
- Driveways
- Air conditioning units
- Gas meters
- Landscaping features
- Solar panels
Common Signs Your Roof Needs Snow Guards
You may benefit from snow guards if you notice:
- Snow sliding off in large sheets
- Bent gutters after winter
- Damaged shrubs
- Ice chunks near entrances
- Snow piles blocking doors
- Scratches on vehicles from falling snow
Cost of Installing Snow Guards
Costs vary based on:
- Roof size
- Roof slope
- Number of guards
- Material
- Installation method
- Local labor rates
Typical homeowner costs include:
| Expense | Typical Range |
|---|---|
| Individual snow guards | $5–$20 each |
| Pipe snow retention systems | $15–$40 per linear foot |
| Professional installation | $500–$2,500+ |
| Large or complex roofs | Higher overall cost |
The cheapest option isn’t always the best. Proper layout and quality products generally provide better long-term value.
When to Call a Roofing Professional
DIY installation may not always be the safest option.
Consider hiring a roofing professional if:
- Your roof is very steep.
- The roof is taller than one story.
- You have a standing seam roof and are unsure about clamp systems.
- Heavy snow loads are common in your area.
- Your roof warranty has strict installation requirements.
- You’re uncomfortable working at heights.
- Your roof has skylights, chimneys, or complex valleys.
A professional can design a snow retention layout that matches your roof’s structure and local weather conditions.
Common Mistakes Homeowners Should Avoid
- Installing too few snow guards.
- Ignoring manufacturer spacing recommendations.
- Drilling into standing seam roofs unnecessarily.
- Mixing incompatible hardware.
- Installing guards only near the roof edge.
- Working on icy or wet roofs.
- Forgetting to inspect existing roof damage before installation.
- Using generic products that don’t match the panel profile.
- Skipping seasonal inspections after heavy winters.
FAQs
Do all metal roofs need snow guards?
No. Homes in areas with little snowfall may not need them. However, they’re strongly recommended where heavy snow regularly accumulates.
Can I install snow guards myself?
Yes, if you have roofing experience, the proper safety equipment, and a roof that’s safe to access. Otherwise, professional installation is the safer choice.
Will snow guards stop all snow from sliding?
No. They are designed to slow snow movement and encourage gradual melting, not permanently hold every bit of snow.
Can snow guards damage my roof?
Properly installed snow guards should not damage your roof. Using the wrong fasteners or drilling where it’s not allowed can create leaks and void warranties.
How many snow guards do I need?
The number depends on your roof size, slope, panel type, and expected snow load. Manufacturers often provide layout recommendations for their products.
Should snow guards be installed on a new roof?
Yes. Installing them during roof installation is often easier and helps protect the finished roofing system from unnecessary modifications later.
Conclusion
Learning how to install snow guards on metal roof systems is about more than attaching hardware—it’s about protecting your home, family, and property from dangerous sliding snow. By choosing compatible snow guards, following manufacturer recommendations, planning the correct layout, and prioritizing safety, homeowners can significantly reduce winter hazards.
If your roof is steep, complex, or covered by a manufacturer’s warranty, working with a qualified roofing contractor is often the smartest investment. Whether you choose a DIY approach or professional installation, properly installed snow guards can provide years of reliable protection and peace of mind during every winter season.